Forums › Forums › Get Technical › HDR › free hdr using gimp
- This topic has 27 replies, 7 voices, and was last updated 17 years, 6 months ago by
Elsinore.
-
AuthorPosts
-
September 22, 2006 at 7:23 pm #723
Anonymous
ParticipantIf you install gimp(http://www.gimp.org/) there is a script that you can download for dynamic range enhancement. You just save the script in /gimp-2.2/scripts (assuming youre using gimp 2.2). To use it you just need an underexposed and overexposed shot opened in different layers in one picture and right click on the image, go down to script-fu – photokit – dynamic range extender and itll open up a window where youll get to play with the settings and itll combine the 2 images.(I dont know any settings or anything to recomend during this because I just started playing with it about 10 minutes ago) Here’s a link that has the dynamic range extender script
http://registry.gimp.org/plugin?id=4436
If this link dies(I had that happen when asking about using scipts in gimp earlier this week and only now have refound the script) you can get to all of the gimp scripts by opening gimp clicking on help – the gimp online – plug-in registry which will open up in your web browser and then clicking image in the plug-ins browse section and then scrolling down and clicking on dynamic range extender and saving in /gimp-2.2/scripts.September 22, 2006 at 7:29 pm #6431ParticipantThat post was by me(linguine in case it doesnt post as me again). Does anyone else have trouble with the message board forgetting that youve logged in once youve logged in?
September 22, 2006 at 7:58 pm #6432Elsinore
KeymasterOh bless you, linguine!! I use GIMP almost exclusively (though recently tried out Bibble for RAW to compare to GIMP’s UFRAW plugin), and I’ve been struggling with how to do HDR stuff.
I checked into Cinepaint, (aka Film GIMP–it’s based on GIMP 1.0 or 1.1). Supposedly it’s able to do HDR, but I wasn’t able to get it to do anything with combining layers for it (maybe I’m missing a library? dunno…), but I finally said screw it, especially because even after combining the layers, you still have to use a command line tool (pfstools) to do the tone mapping. Seems like it would be a big PITA to use command line tools to adjust something in the visual medium. I mean, I’m a geek and pretty hardcore, but I guess I’m not THAT hardcore 😉
I had resigned myself to maybe doing some manual layers blending, basically combining 2 layers and erasing through to reveal the properly exposed portions, kind of like a digital graduated neutral density filter like discussed at Luminous Landscapes. I briefly thought of loading a Winblows based program up into a virtual machine running XP or something, but that thought was short-lived, as I don’t want to lose my geek cred after nearly 4 years of not touching a Gates OS…
So yeah, all that rambling to say, if I can make this work with GIMP under Linux and get some basic HDR results, I owe you a beer! (or some other tasty beverage of your choice)
btw: When I login, I check the box that says to remember me. I haven’t had to re-login for a long time.
September 22, 2006 at 8:34 pm #6433linguine
ParticipantAlright, it says Im logged in so hopefully everything works this time. I also gave cinepaint a try but it kept crashing before I even had time to try anything in it so I gave up on it pretty quickly. I take it by you using the command line that you also use linux, which unfortunately cuts down on the number hdr programs?
September 22, 2006 at 8:45 pm #6434KeymasterYep, hubby and I each have Linux workstations, as well as a Linux box for our file server, LAN, yadda yadda. We do use windowing platforms, though. The command line stuff was in reference specifically to pfstools, though, which is a command line set of tools that can do tone mapping and supposedly various other things with photos. I’m not hard core enough to want to wade into command line type tools to edit photos with, which is why I also don’t use DCRaw for RAW editing (it’s command line), but I like UFRaw which uses DCRaw for computations but has a GUI (much easier).
But yeah, full featured HDR options are limited under Linux, though I could set up a virtual machine (or hubby could) with VMWare and run Winblows in that and load in Photomatix or whatever inside there if I really wanted to. But if I can get something working in Linux natively, even better 😉
September 23, 2006 at 5:33 am #6435KeymasterWell, I downloaded that plugin and tried it out, and it’s a nice little tool! Here’s an example of what I did with it. The sky isn’t great because I had no polarizer–I’m sure that would have helped a lot on its own…
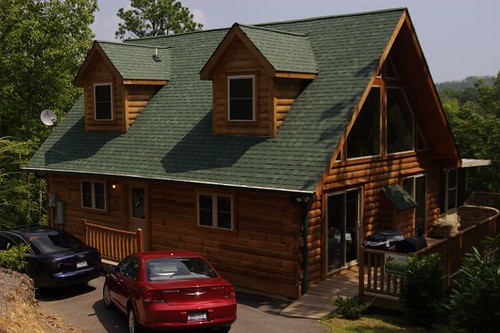
This is straight out of camera, no EV, exposure was for the highlights (primarily the sky):
http://www.flickr.com/photos/lady_elsinore/250227013/
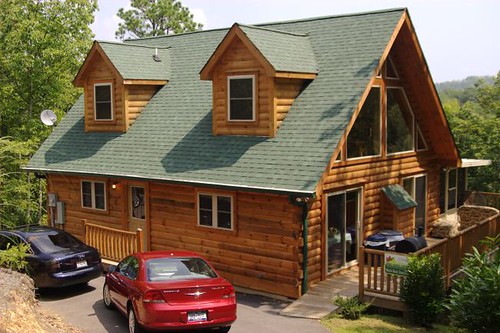
This was +1.38 EV, exposed for the shadows:
http://www.flickr.com/photos/lady_elsinore/250227012/
This is the combined exposure:
http://www.flickr.com/photos/lady_elsinore/250227014/
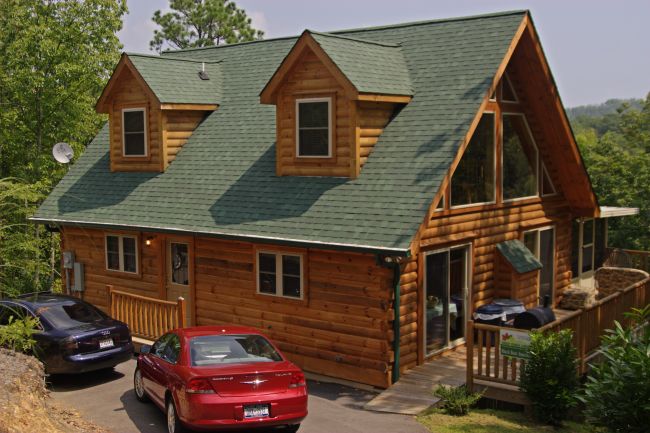
I used the default settings just to see what they would do, and they’re pretty nice. It’s certainly not true HDR (there’s no tone mapping, and you can only combine 2 exposures, though I guess maybe you could combine more than that in multiple steps…), but it’s a nice step toward HDR with GIMP. I’ll definitely have to play with this one more.
Also stocked up on other plugins…lots of new toys to play with!
September 23, 2006 at 3:47 pm #6436KeymasterI’ve played some more with this plugin as well as the “shadow recovery” plugin (available from the same site). I combined the 2 exposures as before, but after they were combined, I then ran the shadow recovery tool at default levels (normal strength, 60% opacity), and this was the result:
http://www.flickr.com/photos/lady_elsinore/250495410/
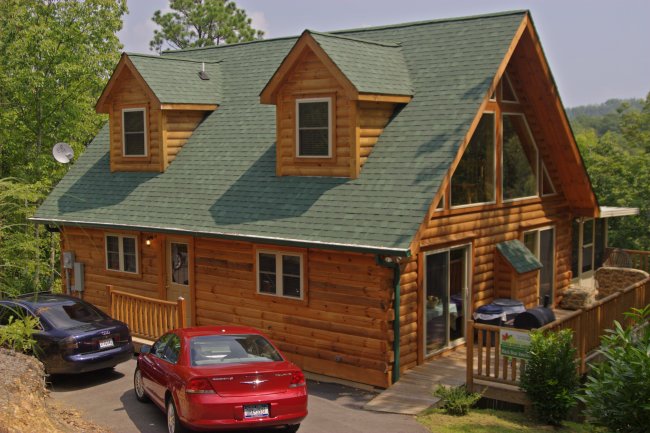
In appearance, it looks maybe bit closer to an HDR image, though of course it’s still not truly an HDR photo. Using the “strong” setting and playing with opacity (you probably want to lower opacity if using the strong setting, as it’s very…strong 😉 )brings up more shadows under the eaves and in the foliage, but of course it predictably increases noise.
I also discovered that the order of layers/exposures stacking makes a difference in the final resultusing the dynamic range extender. Stacking the darker exposure on top of the lighter one seemed to work better; stacking the lighter on top resulted in a darker overall image. YMMV though, particularly since I was using the default 100% setting for opacity; changing that can change the result quite a lot.
The importance of stacking order could limit this plugin’s usefulness in combining more than 2 exposures in separate steps, or it may mean that you need to tweak the opacity some for combinations after the first two. I tried it briefly last night before I realized that stacking order mattered, and I found the final image just kept getting lighter, which messed with the sky. I’ll need to play with it more to see if I can make that work.
Ultimately, I prefer the more realistic looking HDR, so even if this isn’t true HDR, it meets my needs pretty well between the dynamic range extender and the shadow recovery tool. It doesn’t yield anywhere near the painterly effects that I’ve seen from some folks (chakalasp’s example of the woman in the glass chapel is a seriously amazing example), but I haven’t played much with the blur effect, nor have I used this on 2 separate exposures yet (only the same RAW image developed differently).
September 23, 2006 at 4:49 pm #6437Morningbreath
Participantthe ones I have done with photomatix are almost too much like paintings, maybe thats because ofthe subject I am using. or, maybe thats how they are supposed to be. they don’t look real.
I haven’t tried gimp-the last time I downloaded it, some malware came along with it.
September 23, 2006 at 5:21 pm #6438Klahanie
Participantthe ones I have done with photomatix are almost too much like paintings, maybe thats because ofthe subject I am using. or, maybe thats how they are supposed to be. they don’t look real.
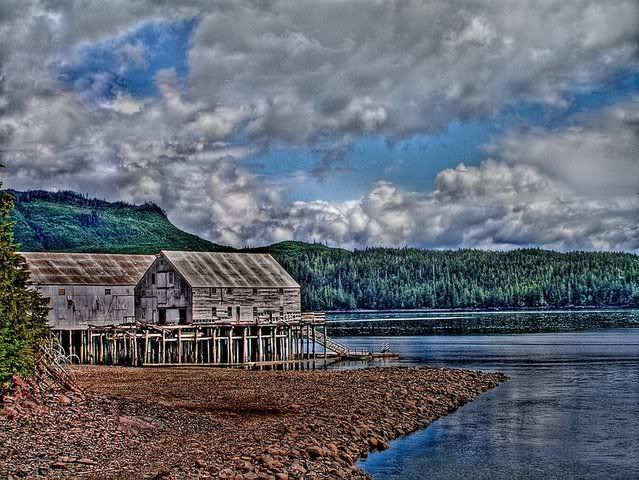
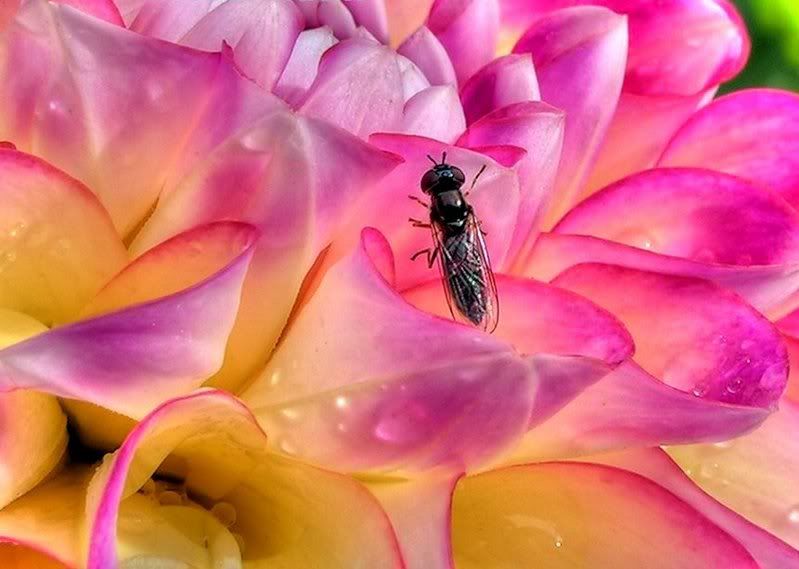
Hi Morningbreath. You can make them more natural looking by increasing (light) smoothing and decreasing strength. Here are a few examples of what I’ve done. The photo of the old cannery is obviously severe, but the dalias look pretty realistic. The cannery photo is one of the first ones I’ve done and needs a lot of work.
 September 23, 2006 at 7:09 pm #6439Participant
Thanks for the tips Galleywench. An old factory I photographed came out pretty similar to yours. I will try closeups, yours look pretty terrific.
September 24, 2006 at 5:28 pm #6440ParticipantThanks for the tips Galleywench. An old factory I photographed came out pretty similar to yours. I will try closeups, yours look pretty terrific.
You’re welcome. I hope to see your factory shot either here or in the thread in a few weeks. And thank you. 🙂
Elsinore, beautiful house! I actually like the first shot the best and at first thought it was the hdr.
September 25, 2006 at 2:32 am #6441KeymasterThanks, GalleyWench–the house isn’t mine, though. It was a cabin my sister-in-law rented for her wedding in August. Beautiful cabin, though, for sure, and literally perched on the side of a mountain.
You thought the very first one straight out of camera was the hdr? That’s funny! I’m loving your dahlia shots there–the colors are gorgeous! I don’t think that’s anything I could do with these little plugins from GIMP, because it still lacks the ability to do any tone mapping, which is where your shots shine.
I’ve played around with another shot of mine with these plugins, and they didn’t work as well, so I’m guessing for them to work best it’s going to have to be certain shots with deep shadows. Also need to try them out on true exposure bracketed shots…
September 25, 2006 at 6:47 am #6442ParticipantThanks, GalleyWench–the house isn’t mine, though. It was a cabin my sister-in-law rented for her wedding in August. Beautiful cabin, though, for sure, and literally perched on the side of a mountain.
You thought the very first one straight out of camera was the hdr? That’s funny! I’m loving your dahlia shots there–the colors are gorgeous! I don’t think that’s anything I could do with these little plugins from GIMP, because it still lacks the ability to do any tone mapping, which is where your shots shine.
I’ve played around with another shot of mine with these plugins, and they didn’t work as well, so I’m guessing for them to work best it’s going to have to be certain shots with deep shadows. Also need to try them out on true exposure bracketed shots…
Beautiful place for a wedding!
Take what I say with a grain of salt. I know it’s time for my first pair of glasses, but I’m having a hard time admitting it. I did take a better look at your pics and can now see the difference. I think I just like the first one better because it is so crisp. Are you using a tripod for your shots, and/or does your hdr program align the images? It just looks a little soft to me, but then again, the ole eyes ain’t what they used to be. 😉
Thanks, I absolutely love dalias.
I found this link through flickr. Is it something you can use?
http://theplaceofdeadroads.blogspot.com/2006/07/qpfstmo-hdr-tone-mapping-gui-for-linux_04.html
Almost everything you were saying about your system went over my head, but I did catch “Linux” in there somewhere. So…
September 25, 2006 at 1:02 pm #6443KeymasterNow see, the fact that you catch the softness suggests you aren’t ready for glasses *quite* yet 😉 The first shot is absolutely crisper, and I prefer that myself for sure. This was one raw image developed at different exposures, so they are aligned, but they are also soft. The reason for the softness is the layer blender plugin does some sort of blur when it combines the layers. You can adjust the blur level, but when I ran it on the above shots, I just ran the whole thing at default levels to see what would happen. I don’t know if the blur feature is to cut down on combined noise from frames or if it’s to blend the highlights and shadows better or not, but it doesn’t make much sense to me otherwise to blur like that. Normally I’d run an unsharp mask (or just turn the blurring off or way down) but I just wanted to see what the 2 plugins did on their own, so I didn’t bother with that.
But omg, now I owe you a beer (or other tasty beverage of your choice) for finding the GUI based pfstools! I’ve downloaded it and will have hubby check tonight to be sure we have all the libraries and whatnot we need to run it. Looks like I still need to get Cinepaint/Film GIMP working to get an actual HDR file to use with it, but it’s obviously possible to do HDR under Linux. Thanks so much!
September 25, 2006 at 4:33 pm #6444ParticipantNow see, the fact that you catch the softness suggests you aren’t ready for glasses *quite* yet 😉 The first shot is absolutely crisper, and I prefer that myself for sure. This was one raw image developed at different exposures, so they are aligned, but they are also soft. The reason for the softness is the layer blender plugin does some sort of blur when it combines the layers. You can adjust the blur level, but when I ran it on the above shots, I just ran the whole thing at default levels to see what would happen. I don’t know if the blur feature is to cut down on combined noise from frames or if it’s to blend the highlights and shadows better or not, but it doesn’t make much sense to me otherwise to blur like that. Normally I’d run an unsharp mask (or just turn the blurring off or way down) but I just wanted to see what the 2 plugins did on their own, so I didn’t bother with that.
But omg, now I owe you a beer (or other tasty beverage of your choice) for finding the GUI based pfstools! I’ve downloaded it and will have hubby check tonight to be sure we have all the libraries and whatnot we need to run it. Looks like I still need to get Cinepaint/Film GIMP working to get an actual HDR file to use with it, but it’s obviously possible to do HDR under Linux. Thanks so much!
Ah, RAW. That’s another thing I know nothing about, but I’m finally getting a dslr (Nikon d80, thanks perm fund!) so I’ll have to learn. Said dslr is on it’s way, but I just checked shipping status and it went from California to Seattle, and now it’s back in California today. wtf?
Anyhoo, you’re welcome! I hope it works for you.
-
AuthorPosts
- The topic ‘free hdr using gimp’ is closed to new replies.