Forums › Forums › Get Technical › In the darkroom › Layers, Blend Modes, and the digital darkroom
- This topic has 47 replies, 13 voices, and was last updated 13 years, 4 months ago by
Curious.
-
AuthorPosts
-
November 26, 2010 at 12:15 am #2151
SilverStag
ParticipantThis will be a lengthy lecture, class, so get comfortable.
In the Autumn II contest discussion, Elsinore said:
I think what concerns me about layers is that it’s kind of like compositing different exposures, which is too similar to HDR for my tastes. But I’m open to a clarifying discussion (probably should put it on another board/thread, though!). I don’t use a lot of that kind of post processing myself, mostly just curves, contrast, saturation, and unsharp mask.
Your wish, my command, etc. milady.
This is the photo I will be using for this class. I took it near daybreak at Wells, NV, the day after Thanksgiving, 2009:
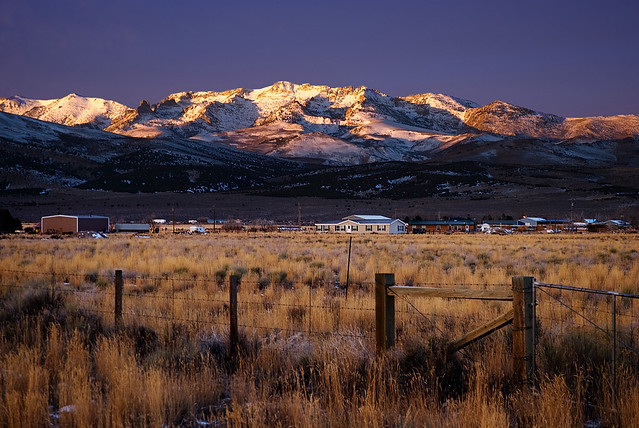
Color Final by pjern, on Flickr(BTW, clicking on any image should take you to the larger lightbox version on Flickr)
This is the photo exactly as it came out in Camera raw, with only the automatic settings applied:

As opened in Camera Raw by pjern, on FlickrNot very inspiring that way, is it? Let’s do a straight desaturation conversion to black and white via Photoshop CS3:
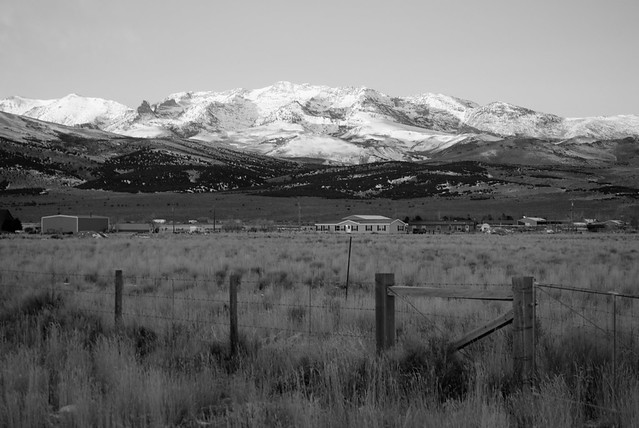
Straight B&W conversion by pjern, on Flickr(and to be absolutely straight about this, even the straight B&W conversion in Photoshop involves a layer!)
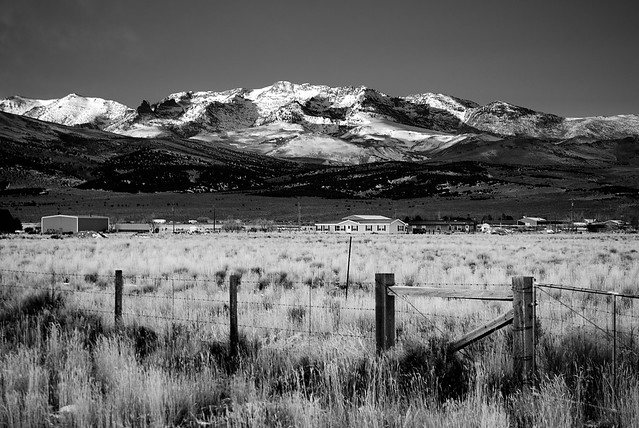
This is applying the color sliders to taste in the black and white converter in Photoshop CS3. The adjustments I chose were more or less equivalent to a medium green filter on B&W panchromatic film:
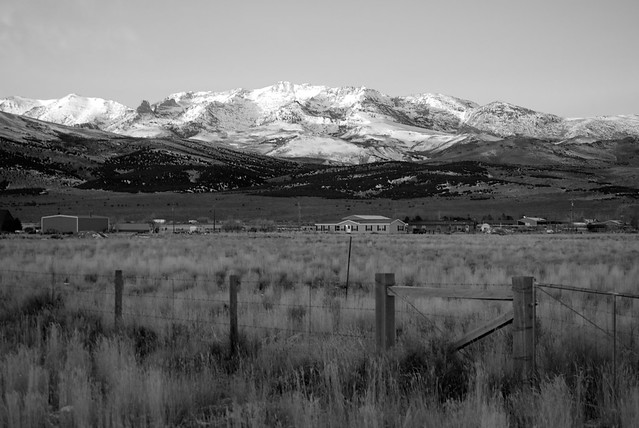
B&W conversion with contrast filters by pjern, on FlickrNow some layer logic- This is a layer with Multiply blending mode. It is exactly equivalent to a one-stop overexposure (burning) in the enlarger with film and paper:
Multiply blending Mode by pjern, on FlickrThis is the normal layer with Screen blending mode. It is equivalent to a one-stop underexposure (dodging) with film and paper:
Screen Blending Mode by pjern, on FlickrSoft Light Blending mode adds contrast, an effect which you can get in the analog darkroom by juggling paper type, developer, and developing times:

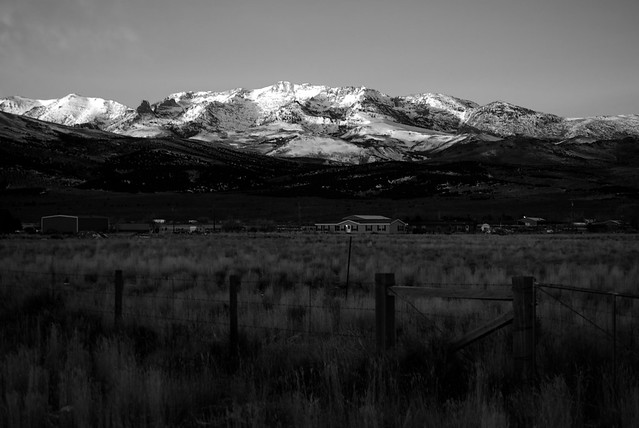
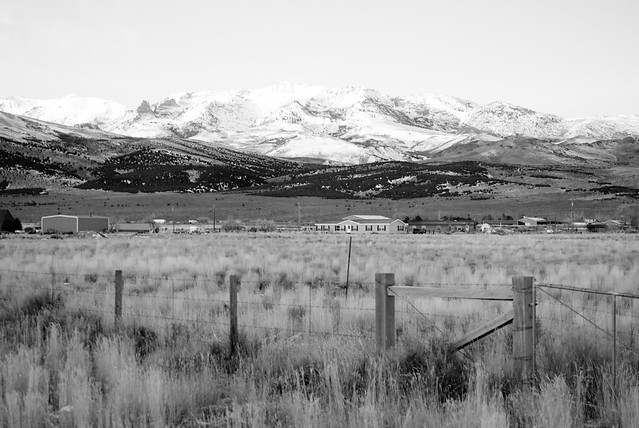
Soft Light Blending by pjern, on FlickrUsing all that we’ve learned above, here’s the final product:
The bottom half is Screen mode (dodged), and the top half is Multiply mode (burned), with contrast (Soft Light) added to taste, and curved and sharpened in Photoshop.
Every one of the operations described above are easily performed in a traditional darkroom by a photographer of average skill. (except the green filter, which of course had to be done in the field, although it could, in fact, be done with an internegative from a color slide. I just remembered that little trick!) The point is that the modern darkroom sits in your computer behind an icon marked ‘Photoshop’ or ‘GIMP’ or ‘Paint Shop Pro’….it’s just been virtualized. I’ll put the philosophical discussion in a separate comment.
November 26, 2010 at 3:14 am #36283Curious
ParticipantEvery one of the operations described above are easily performed in a traditional darkroom by a photographer of average skill.
please bear with me while i nit pick. having some darkroom time i’m taking issue with your use of the terms “burning” and “dodging”. i was taught and always used those as spot treatments. and in my copy of PS7 the use is the same.
now your over and under exposures applied across the entire image do match the farktography rules. i’ll leave it to others to comment on the use of layers.
November 26, 2010 at 3:43 am #36284Participant“Burning” = Adding exposure in the traditional darkroom.
“Dodging” = Removing exposure by blocking light in traditional darkroom practice (making a positive from a negative image).My use of the terms is in the frame of reference of a traditional analog darkroom. 40+ years of experience dies hard.
Since we are actually working on a positive image, it may be technically correct to reverse the terms, or find new terms of art for new media. (‘Screen’ and ‘Multiply’ come to mind. 🙂 )
If you add a black layer mask, you can spot lighten or darken much like one might in a traditional darkroom. Regarding burning or dodging being ‘spot treatments’, there’s no rule saying how big an area the ‘spot’ must or must not cover. I’ve burned a third to half of a print many times.
November 26, 2010 at 3:44 am #36285Elsinore
KeymasterSo what did you do to get a completely different color sky in the color version up top?
November 26, 2010 at 3:51 am #36286ParticipantSo what did you do to get a completely different color sky in the color version up top?
I edited the cyan channel the with the hue/saturation control- since there was little blue anywhere else in the image, it mostly affected the sky. I was trying to recreate the color I remembered in real time. Also, the top image has a multiply layer applied, much as the bottom b&w one does, to darken it. that also caused a bit of a color shift.
November 26, 2010 at 4:11 am #36287Participant“Burning” = Adding exposure in the traditional darkroom.
“Dodging” = Removing exposure by blocking light in traditional darkroom practice (making a positive from a negative image).My use of the terms is in the frame of reference of a traditional analog darkroom. 40+ years of experience dies hard.
Since we are actually working on a positive image, it may be technically correct to reverse the terms, or find new terms of art for new media. (‘Screen’ and ‘Multiply’ come to mind. 🙂 )
man i hate to do this but …… ok we agree on the terms in that burning adds and dodging subtract exposure. now in PS7 even working with a positive using those tools has the same effect as a darkroom does when using a negative to create a positive. in other words if i use the burn tool on an area of the image it gets darker.
my objection was to the use of those terms when applied evenly to the entire image. while it’s been 30+ years since i was in a darkroom last to me those terms denote spot treatment. and yes it can be a large spot 🙂 i too have added/subtracted exposure to 1/3 of an image.
IMHO you stated what you did better when you talked about over or under exposing the entire image. i have underexposed negs that have to be printed with more exposure as compensation. that is a gross over simplification but i hope you understand it.
November 26, 2010 at 5:04 am #36288ParticipantLet’s not derail this into a discussion of semantics, OK?
November 26, 2010 at 2:22 pm #36289ParticipantOK
November 26, 2010 at 7:43 pm #36290KeymasterI think I have a problem with the bottom half of an image being exposed one way and the top half being exposed another way with the final image being basically a composite of the two. That level of playing with partial exposures on the image seems very like HDR to me. And while I have no issue with increasing the saturation (within reason) of the cyan channel, the result on your example is so drastic as to almost appear to be a whole new sky created and that seems to run counter to at least the spirit of Farktography rules.
November 26, 2010 at 10:45 pm #36291sleeping
ParticipantI think I have a problem with the bottom half of an image being exposed one way and the top half being exposed another way with the final image being basically a composite of the two.
That isn’t really what’s happening here though., there’s really only one exposure, the final image is just combining darker and lighter versions of the same exposure that were created with standard darken/lighten controls.
The fact that it’s done using layers isn’t actually all that relevant to the final result, there are (as usual with photoshop) any number of ways to accomplish the same thing with other tools.
The big reason experienced photoshop users rely so heavily on layers is that they are non-destructive to the original image – if, for example, you start painting on the main layer with the dodge and burn tools, you’re destroying the original data and it’s not easily reversible.
November 27, 2010 at 12:15 am #36292ParticipantI’d beg to differ, but your understanding and my understanding of HDR may be quite different. HDR is an artificial construct originally designed to counter the limited dynamic range of digital images. To a limited extent, the curves tool in Photoshop (or its GIMP equivalent) can be used the same way to artificially stretch the apparent dynamic range of an image.
HDR is a solution in search of a problem at this point: Displays that can display true HDR and printers and paper that can print it do not yet exist, for all practical purposes, outside of a few very specialized experimental devices. You’re not likely to get one at Best Buy anytime soon.
Where HDR gets in trouble is in the tone mapping process, when heavy-handedness creates the psychedelic effects that make it so (rightly, IMNSHO) despised. If you want to create a psychedelic montage of a Disney scene, fine. Just don’t make me look at it 🙂
Now, to your criticism of my methods:
Lets say I’m in the darkroom, and I make a test print that looks like the straight B&W conversion above. How might I produce the bottom version? The first step is going to be to choose a much more contrasty paper/developer combination, say Ilfospeed RC Deluxe grade 4 in RC developer 1:9.
Another test print is now in order to see if we have the contrast correct. (This is analogous the Soft light filtering over the entire image in the virtual darkroom).
Now, I’ll look at the print and decide what corrections I need to make. I want the grasses and fence in the foreground to stand out (i.e. be lighter) by about 1 stop, so I’m going to start dodging the bottom half after about half the average exposure time. (Screen mode and a layer mask to be the virtual ‘cardboard’ used for the dodging. The computer ‘mask’ is applied counter to logic, since i want the dodged effect to be the lower half of the image.)
As the exposure progresses towards the nominal time, I’d slowly move the (in the physical world) mask upwards to the point where I want the ‘burning in’ to begin. I’d then let the exposure time progress towards double the nominal exposure in order to ‘burn in’ the sky and the mountain a stop (or more).
I don’t think that it should be a hard concept to see the analogies between what I do in Photoshop and what I did over 30 years in darkrooms.
In re: the color shift: Cameras are notorious liars to begin with, and a camera as demonstrably imperfect as a digital camera lies even harder. I was trying to recover the remembered color of the dawn hour where the sun was just reaching the mountaintop, and the dark sky beyond provided an extraordinary contrast. The meter in the camera bollixed up the exposure for fair, so it was up to me to try and recreate what I saw and felt.
If you think I manipulate my images too much, I might encourage you to read some Ansel Adams, notably The Print or Examples for some insights into the whys and wherefores. I think a lot of it is still applicable today.
I’m enjoying the give and take here; I’d like to see more people participate.
(Editing to say when I used the word criticism, I was trying to use it in an academic or prescriptive manner, not pejorative. Just for the record.)
November 27, 2010 at 1:57 am #36293ennuipoet
ParticipantI’m enjoying the give and take here; I’d like to see more people participate.
FWIW, I think you’re right. The method you use is a digital analog (HA!) of a accepted darkroom process. I would say it is fair to use in Farktography.
In re: the color shift: Cameras are notorious liars to begin with, and a camera as demonstrably imperfect as a digital camera lies even harder. I was trying to recover the remembered color of the dawn hour where the sun was just reaching the mountaintop, and the dark sky beyond provided an extraordinary contrast. The meter in the camera bollixed up the exposure for fair, so it was up to me to try and recreate what I saw and felt.
Of course, I make the same argument about HDR. The best correction of this shot:
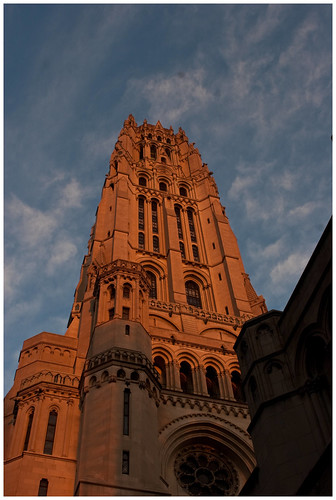
is just to dark, the sky is dropped off and the shadows deeper than they really were, also the color of the stone in the sunrise was shades redder than the captured.
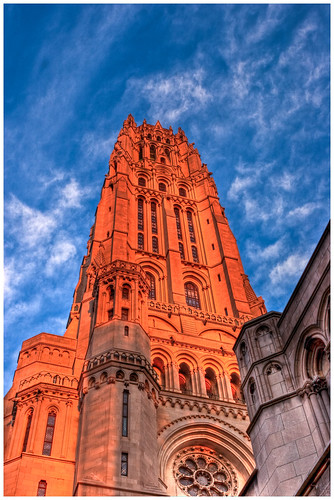
So, using a HDR I am closer to the tonal range of the actual conditions. Looking back at this shot, I should actually cool the temperature of the shot down but with the sun hitting the building just over the horizon, this was as close to the actual scene as I could make it. And I couldn’t do without the software.
November 27, 2010 at 2:17 am #36294nobigdeal
ParticipantAll this darkroom talk is a bit beyond my learning. 1 year of photography class in HS only took us so far. I do understand what you are saying and the processes you describe make sense to me. I do not feel as though these steps violate the letter of the law of farktography rules, however I can see how some might feel it is skirting the line. I use layers all the time in my processing, as sleeping said, it is the best way to work images without damaging the original file.
November 27, 2010 at 2:30 am #36295KeymasterI think I have a problem with the bottom half of an image being exposed one way and the top half being exposed another way with the final image being basically a composite of the two.
That isn’t really what’s happening here though., there’s really only one exposure, the final image is just combining darker and lighter versions of the same exposure that were created with standard darken/lighten controls.
And yet, there is a whole area of HDR that relies on creating HDR from a single exposure by taking darker and lighter versions of the same exposure (or taking a RAW file with more and less exposure compensation) and stacking it into an HDR.
SilverStag: To your point about Ansel Adams, I do understand that much of what you show is in some ways analogous to what he did in the dark room. I know that he manipulated both negatives and prints quite a lot. I think what trips me up is that despite the rule changes a couple years ago that gave us more leeway with post-processing, Farktography was always about seeing what we can do with our cameras, not what we can do with our computers. You could certainly accomplish a lot of what you did in post processing by using graduated filters on your lenses when taking the shot.
When we were discussing the potential rule changes in 2008, I think you’d posted a series of example photos then too, and IIRC there was a point in the series of examples where several people felt it crossed into “too much” for Farktography. Up to that point, it seemed fine, but beyond that it seemed a touch much. I guess I felt like the rule changes at the time were fairly clear and fairly generous as to what we were allowing, but I’m really just not sure how I feel about the level of post-processing shown in this series. Please don’t take this as a personal attack. I’m just sort of Farktography old-school I guess, and it just seems to run counter to the spirit of the rules (“show us your camera skills/we don’t care much about your computer skills”) even if it’s in line with the current wording.
November 27, 2010 at 3:17 am #36296ParticipantI think I have a problem with the bottom half of an image being exposed one way and the top half being exposed another way with the final image being basically a composite of the two.
That isn’t really what’s happening here though., there’s really only one exposure, the final image is just combining darker and lighter versions of the same exposure that were created with standard darken/lighten controls.
And yet, there is a whole area of HDR that relies on creating HDR from a single exposure by taking darker and lighter versions of the same exposure (or taking a RAW file with more and less exposure compensation) and stacking it into an HDR.
Sure, but I don’t think that’s particularly comparable. Running a single exposure through an HDR processor like that isn’t going to increase the dynamic range of the image any more than you could using the fill light/recovery tool (or equivalent) in a raw processor anyway – the only point of the HDR in that case would be to introduce tone mapping artifacts into the final image (Photoshop CS5 actually has tools to tone map a single image without even doing the multiple raw images now…)
-
AuthorPosts
- The topic ‘Layers, Blend Modes, and the digital darkroom’ is closed to new replies.