Forums › Forums › Get Technical › Tips & Tricks › easy HDR w/o tonemapping and natural colors
- This topic has 9 replies, 5 voices, and was last updated 15 years, 2 months ago by
 orionid.
-
AuthorPosts
-
May 2, 2011 at 5:55 am #2049
chupathingie
Participantsoosh‘s recent post of cool macro shots using focus stacking got me started on a roll today…
What you need (all free):
Hugin’s image stacker
Enfuse/EnblendI’m working in Linux, so other OS users may have some syntax variations. Enfuse also works for focus stacking, but I’m still toying with that…more when I figure things out.
Steps:
Dump your bracketed shots into a directory (I used .jpgs just because it’s late…).
Open a terminal window and navigate to this directory.
Typealign_image_stack -m -a ais *.JPG
Type
enfuse -o result.tif –exposure-weight=1 –saturation-weight=0 –contrast-weight=0 *.tif
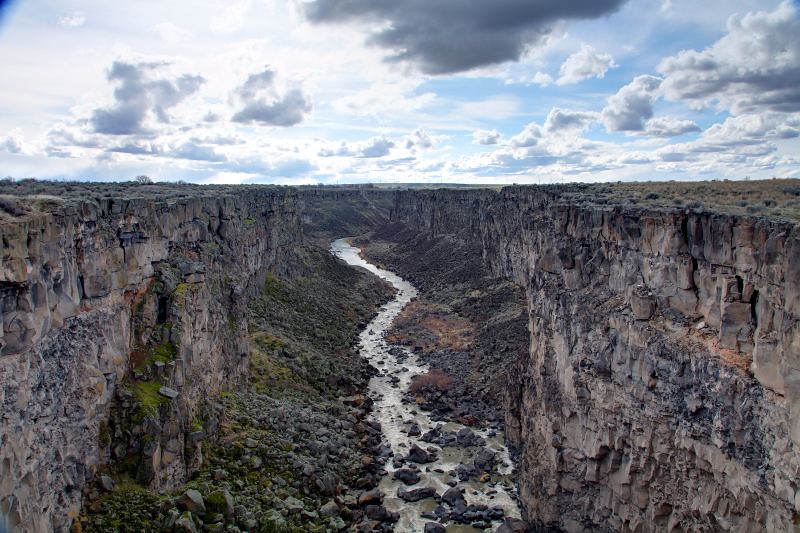
Result: (note… I didn’t get an underexposure for the sky, so it’s a bit washed out…my bad…sorr.)
 May 2, 2011 at 11:14 am #33331
 orionidParticipant
Interesting…. Photomatix has a fuse option….. Wonder if it’s similar?
May 2, 2011 at 1:32 pm #33330Farktographer
ParticipantI agree, interesting. I get tired of trying to do HDR and coming out with unrealistic results, so I’ll give this a shot. I’d have figured photoshop had a good way to do this but for the life of me I can’t figure it out properly (seems user-unfriendly when it comes to the HDR in CS5, or I’m just dense and can’t figure it out).
May 2, 2011 at 3:37 pm #33329ParticipantA quick run-down for the CLI-averse (I know that code up there looks like greek to most):
align_image_stack -m -a ais *.JPG
This pulls all of the .jpgs in the directory and registers them, then outputs new images as described below. The -m option forces scaling on the second to last images so that their FOV matches the first image. The -a option forces output images to be incremented beginning with “ais” (.tif is default, so ais0000.tif, ais0001.tif etc for however many images are in the directory). *.jpg simply says to perform the operation on all .jpgs in the directory. Change to *.tiff or whatever format your images are in. Default bit depth seems to be whatever the bit depth of the originals are, so 16bit tif in= 16bit tif out.enfuse -o result.tif –exposure-weight=1 –saturation-weight=0 –contrast-weight=0 *.tif
calls enfuse with the following options:
“-o result.tif” specifies the output filename and type. Default is “a.tif” if unspecified. Output bit depth also equals input bit depth.“–exposure-weight=1” gives priority to pixels that are closest to the center of the histogram.
“–saturation-weight=0” and “–contrast-weight=0” disables these two options from their defaults (we’re interested in exposure levels with HDR, so they are not needed).
“*.tif” sets the input images, ie all tiffs in the directory. If your original files were tiffs, this should read “ais*.tif” to avoid loading the unregistered images that have not been processed by align_image_stack.
May 2, 2011 at 5:48 pm #33328linguine
ParticipantI agree, interesting. I get tired of trying to do HDR and coming out with unrealistic results, so I’ll give this a shot. I’d have figured photoshop had a good way to do this but for the life of me I can’t figure it out properly (seems user-unfriendly when it comes to the HDR in CS5, or I’m just dense and can’t figure it out).
I don’t know how much things have changed from CS2 to CS5, but heres a tutorial chakalakasp made a couple of years ago for CS2 http://backingwinds.blogspot.com/2006/10/how-to-create-professional-hdr-images.html
May 2, 2011 at 11:32 pm #33327ParticipantI agree, interesting. I get tired of trying to do HDR and coming out with unrealistic results, so I’ll give this a shot. I’d have figured photoshop had a good way to do this but for the life of me I can’t figure it out properly (seems user-unfriendly when it comes to the HDR in CS5, or I’m just dense and can’t figure it out).
I don’t know how much things have changed from CS2 to CS5, but heres a tutorial chakalakasp made a couple of years ago for CS2 http://backingwinds.blogspot.com/2006/10/how-to-create-professional-hdr-images.html
Thanks for the tip – I have some HDR’s to assemble in the next couple days so I’ll give this a shot.
May 3, 2011 at 2:19 am #33326ParticipantI just ran a sequence through enfuse vs my usual qtpfsgui settings… I think I like the more natural look of enfuse. I tried a handful of manual methods in gimp (gleaned from whatever PS tutorials I could find) and though they worked fairly well with the demo images, the results with a sampling from my collection of bracketed landscapes looked like poop. Tonemapping algorithms are pretty finicky, and results vary depending on everything from image size to level of detail.
Anyway, here’s my comparison… qtpfsgui, left; and enfuse, right:

The halo along the horizon in the left image really sticks out. No halo at all in the enfuse image. Plus the colors look natural (to me, anyway). Even though I find the qtpfsgui image interesting to look at, the Emo Pallette isn’t what I’m looking for. Enfuse’s processing more closely resembles the scene as I remember it; and it doesn’t make you think “HDR” as soon as you look at it.
May 3, 2011 at 2:47 am #33325CauseISaidSo
ParticipantI agree, chup – the one on the right is much more natural looking. Would you mind posting an unprocessed version to compare against?
What do you do for aligning your bracketed exposures (or do you just use a tripod to make sure there’s no misalignment)?
May 3, 2011 at 3:06 am #33324ParticipantThis series I shot hand-held (man, but I loves me some auto-bracketing), but if I’m doing more than 3 subs I’ll use a tripod. Even then, I run them through align-image-stack before compositing (see first post) since I never seem to manage to not nudge my rig changing exposure settings.
Here’s the 0,-2,+2, fused series: (if I’m making these too large for convenience, say the word and I’ll resize). If you look closely, you can see where the stacker has corrected for drift and yaw…
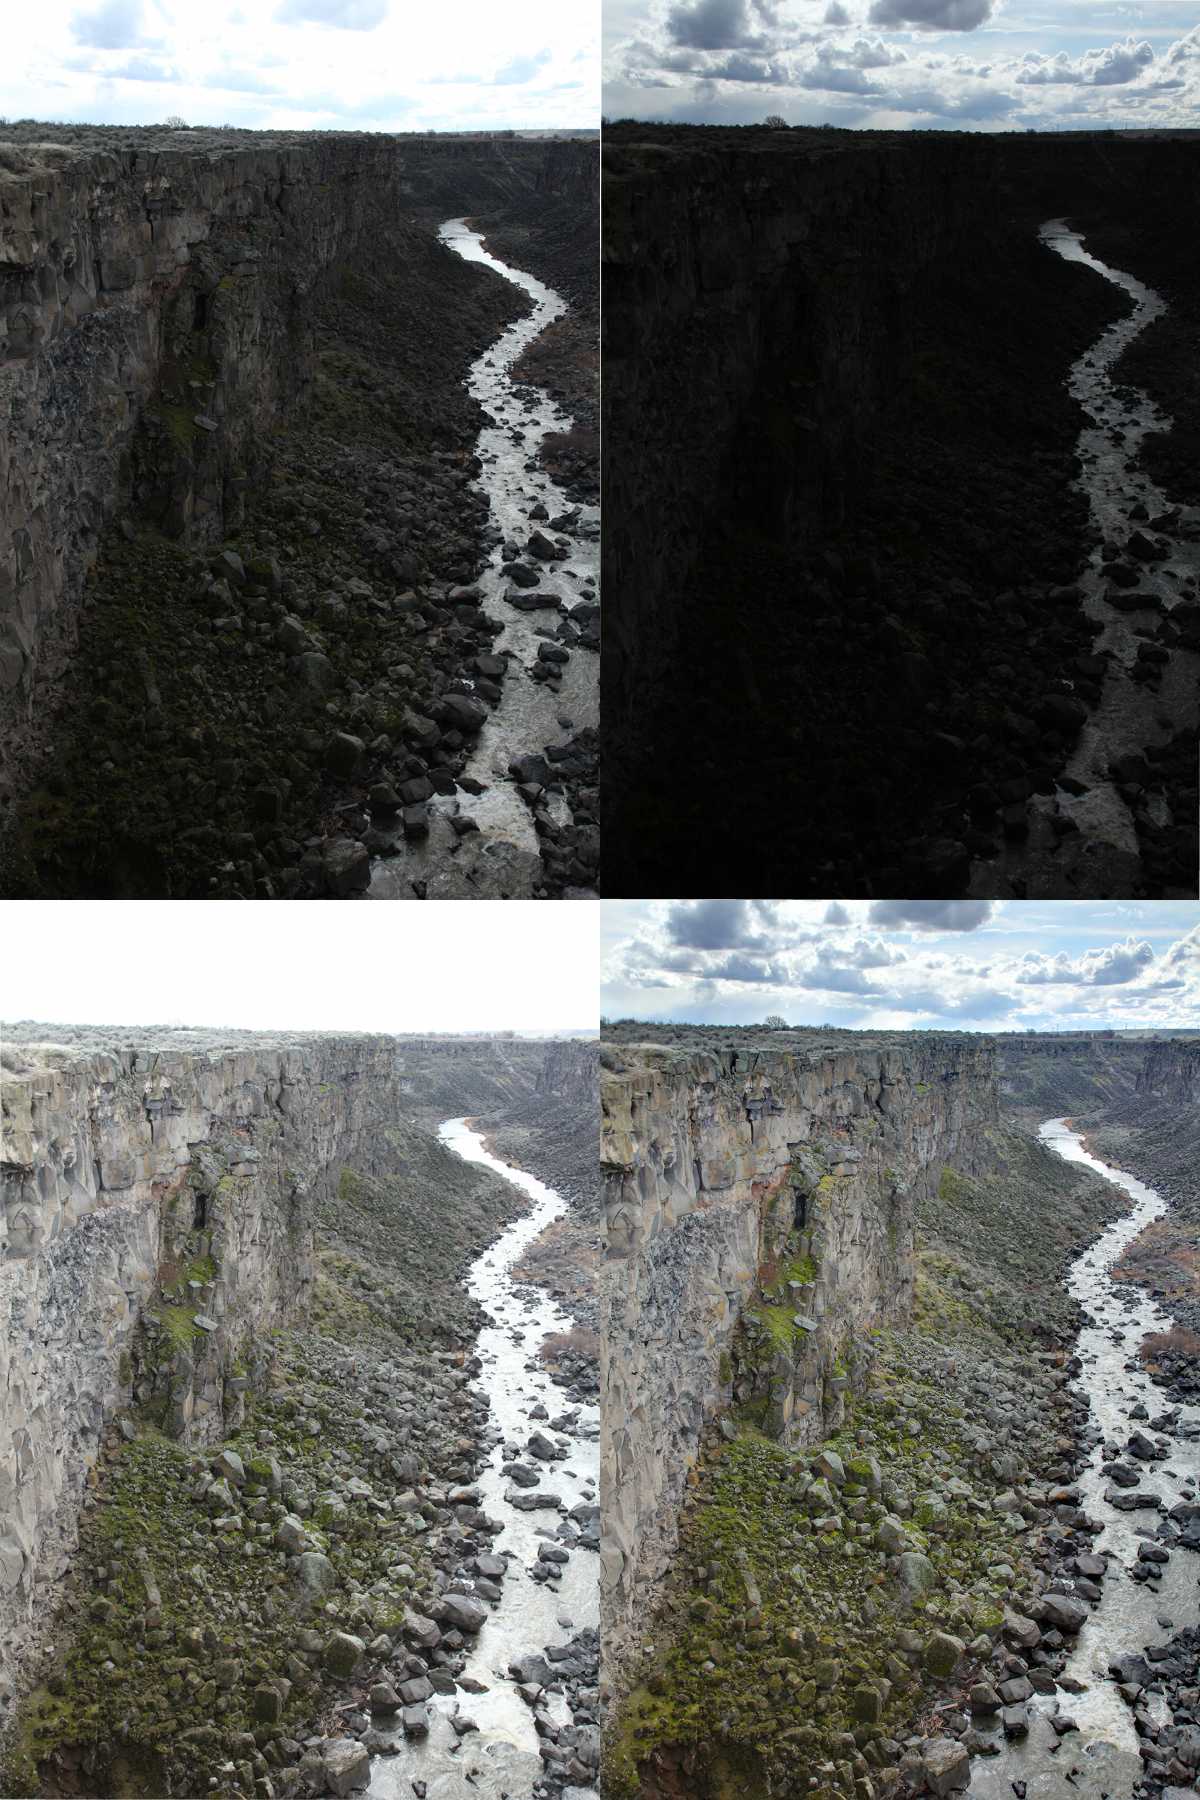 May 3, 2011 at 3:59 am #33323Participant
Thanks, chup. Seeing the originals makes it even more impressive; it did a great job of combining the exposures while retaining the natural look.
I’ll have to give that a try sometime. I’ve got a bunch of handheld bracketed exposures that I tried running through the trial version of Photomatix and it did a horrible job of alignment.
-
AuthorPosts
- The topic ‘easy HDR w/o tonemapping and natural colors’ is closed to new replies.